Sunday 9 February 2020

Papalo days to harvest

Papalo is an ancient herb that is commonly grown and eaten in South and Central America but is practically unheard of here.  Finding seeds of this amazing herb in Australia was far more difficult than I had imagined.

Papalo has a unique and intense taste, it is often used as a substitute for coriander leaf but they taste different.  Young papalo leaves are mild and older leaves are more potent.  I love the taste of papalo, it is one of my absolute favourite edible herbs.

Unlike coriander, papalo grows well in the heat of summer.  It is said to be drought tolerant, but mine wilts badly on hot days and picks up nicely after it gets a bit of water.
Papalo leaf showing oil glands
There is a bit of confusion over the binomial name, I a told they were Porophyllum coloratum but there is a chance that they may be a different form of Porophyllum ruderale.  Until I am a little more certain I will only list the genus.

I planted two batches of seed, both had dreadfully low germination rates, which is meant to be common in papalo.  Papalo grows vigorously and its smell/taste is remarkably strong so you only really need 1 or 2 plants.  This summer was incredibly harsh so these days to maturity may not be representative of an average year.

Days to maturity papalo (Porophyllum sp)

Seeds planted       17/08/2019       Day 0
Germinated           03/09/2019      Day 17

These died off before the first true leaf stage so I planted another batch. I think heat/sun killed them.  I gave the second set of seeds protection from the afternoon sun, and they fared much better.  In a less intense year they would do fine with full sun, but this year we skipped spring and went straight from winter into a raging summer which isn't great for small seedlings.


Seeds planted       01/11/2019      Day 0
Germinated          18/11/2019      Day 17
Harvest start         22/12/2019      Day 51
Flowering             28/03/2020       The growing conditions are not ideal, I assume they should flower earlier than this


Papalo starting to flower

I started to harvest earlier than I should, but I couldn't wait to taste papalo.  I am guessing a decent harvest would have started around day 80.

Click here for a full list of vegetable days to maturity when grown from seed, this includes vegetables, fruiting vegetables, culinary herbs, berries, and carnivorous plants.

Saturday 8 February 2020

Quillquiña days to harvest

Quillquiña (also spelled quilquiña, quillquina, quilquina, and probably a few other ways) is an ancient herb that is similar to papalo.  While papalo is virtually unheard of in Australia quillquiña is even less common and no one seems to know of it.  They smell and taste pretty similar to me.

I was told that they are classified as Porophyllum ruderale but there is some confusion over the binomial name, and there is some confusion regarding if this is a different variety of papalo, or a different subspecies, or a different yet highly similar species.


Much like papalo these seeds displayed a dreadfully low germination percentage this year, but this is meant to be representative of these herbs so I was expecting it.

Please note that the days to maturity listed were recorded in my garden in Australia, these numbers will be slightly different under different weather conditions and different years.  They are intended only to provide an indicative guide.

Days to maturity quillquiña (Porophyllum sp)

Seeds planted       17/08/2019       Day 0
Germinated           03/09/2019      Day18
Similar to my papalo, these seedlings all died when tiny so I planted another batch.  I gave the second set of seeds protection from the afternoon sun and they survived and went to to produce large plants.  In a less intense year they would do fine with full sun, but this year broke many heat records.

Days to maturity quillquiña (Porophyllum sp)

Seeds planted       01/11/2019      Day 0
Germinated          19/11/2019      Day 18
Harvest start         29/01/2020      Day 89
Flower start          01/04/2020

Quillquiña, they were larger than this when I started to harvest the leaves
For a full list of vegetable days to maturity when grown from seed, including herbs, berries, and carnivorous plants, please click here.

Saturday 1 February 2020

Target hops Australia

This summer has been exceedingly harsh and many of my plants did not cope.  One of the few plants that coped this summer was hops (Humulus lupulus).

Hops are commonly used in brewing beer, but they have many other uses.  The young shoots are said to be the world's most expensive vegetable, it is used in pillows to aid deep sleep, and it is used to make a calming tea.  I have read that hops has a heap of other uses such as providing summer shade, is useful as livestock feed, when fed to cattle reduces the amount of ammonia produced, can be planted in a way that reduces soil erosion and stabilises banks, and is meant to hold potential for producing biofuel.
Target hops quickly grew tall

Hops is dioecious which means individual plants are either male or female.  The unfertilised flowers from female plants are used in beer.  Most hops plants for sale are female plants as they are the most useful.
Hops female flower - this will eventually turn into the cone
Male hops plants are incredibly difficult to source in Australia, and I know of nowhere reliable that sells seeds in Australia (I am sure there are plenty of thieves on eBay making money from fake seeds), so backyard hops breeding is out unless I can find a male plant.
Hops leaf - similar to grape leaves
There are a handful of different varieties of hops available in Australia and each tastes different.  I wanted to grow a variety that was fruity and floral as that sounds interesting.  I also wanted to grow something that is a little unusual as that would be more useful to home growers than the more common varieties.  If you are going to grow something, you don't bother growing something that is the same as you can get in the shops when you can grow something better/unique!

The hops variety I have is called 'Target'.  Target hops is said to have been bred at the Hop Research Institute at Wye College in England, and released to the public in 1992.  Not many places sell target hops plants in Australia, and homebrewers who grow target hops tend to rave about it.

I have read on the internet that target hops have "very very complex fruity flavours and aromas with hints of Floral".

Another source says "I get stonefruit, passionfruit, pineapple, kiwi fruit, melon from this. Perfectly complements any type of English ale. Especially English IPAs and Pale Ales".

A place that grows and sells a lot of hops varieties site states that Target hops are "Extremely good for dry hopping to add some fruity aromas. Goes very well mixed with Columbus or Chinook to offer a much more rounded flavour profile. Probably my favourite varieties we grow here. Crops pretty well for a UK variety. The numbers are similar to Columbus however the armoas and flavours are worlds apart as in new and old world! I love the stuff personally cannot get enough of it".

The place I bought my plant from tests their hops regularly and said their Target hops contain 9.5% Alpha acids with 35% Cohumulone.


To me that sounds like target hops is very fruity and floral, and rather different from the kind of thing that is easy to find at shops, which is exactly what I was hoping for.

Target hops also sounds as if it is well suited to home growers.  Not only is it unique and tastes nice, it is also meant to be one of the more vigorous varieties, one of the easier varieties to grow, and one of the heavier croppers that are easy to harvest.  Target hops sound like a winner to me.
Target hops growing in a large pot of soil
Hops can be grown in the ground, or it can be grown in a pot of soil.  I have heard of hops spreading underground and being difficult to contain.  I also wasn't sure where I wanted to plant hops long term, and I want a few other named varieties and don't want to mix them up, so I chose to plant hops in a large pot of soil enriched with aged chicken manure.

Growing in a pot will likely result in a smaller plant with a lower yield than if it was soil grown, but it will be simpler to control and easier to divide over winter.  It will also mean that I won't mix up different varieties in the future.

Hops needs a tall and strong support on which to grow.  I have toyed with the idea of growing it over the chicken run to provide shade and I think that it could be well suited to that use, but for now I am using some long sticks tied together.

I have a photinia hedge that has the occasional plant of privet that pops up each year.  The privet grows rather tall before I notice it sticking out of the top of the hedge.  These long straight sticks make an ideal climbing structure.  Some of the photos have one stick, some have two or three.  I added to them over the growing season and eventually made a teepee out of them tied with string at the top.  This works really well and is easy to replace each year.
Target hops scrambling taller every day
I have taken a few cuttings from my hops, and if the plant is large enough may be able to divide the rhizome over winter.  If I have extra plants I plan to list them on my for sale page along with other perennial vegetables and interesting edible plants.

Saturday 25 January 2020

Strawberry spinach days to harvest

Strawberry spinach is sort of a dual crop, the leaves are edible raw or cooked and taste much like spinach.  The berries look like mulberries and have tiny hard seeds in them.

This summer has been extreme and many things failed in my garden, but strawberry spinach kept on growing.  They did not yield as many leaves as either regular spinach or silverbeet, but they cope with the heat far better than true spinach and they provided quite a lot of little berries that my kids seem to like eating.

Below are strawberry spinach days to maturity from my garden this year.  It was record hot and dry this year, plus we had weeks of thick bush fire smoke and dust storms., so potentially they would have been a bit earlier in a typical year.

Days to maturity Strawberry spinach (Chenopodium capitatum)

Seeds planted       10/08/2019       Day 0
Germinated           25/08/2019      Day 15
Harvest leaf          ??/??/2019       I didn't record this, it was pretty early
Flowering             24/12/2019       Day 146
Berry harvest        20/01/2020       Day 173

To view a full list of vegetable days to maturity when planted from seed click here.
Strawberry spinach fruit looks like red mulberries
Almost ripe, growing in a polyculture with other vegetables
Strawberry spinach, when they are ripe the ants sometimes eat them

Wednesday 22 January 2020

Summer Coriander, Papalo, and Quillquina

Here in Australia (and a few other countries) we refer to the leaf of Coriandrum sativum as ‘coriander’, and the seeds/fruits of the same plant as ‘coriander seeds’.  In North America and a few other countries people usually refer to the leaf of this plant as ‘cilantro’ and call the seeds/fruit ‘coriander’.  For clarity, any time you see the term ‘coriander’ being used in this blog post I am referring to the leaf and/or entire plant of C sativum.

Some people hate coriander, others love it, there appear to be very few people in between.  Some people have a mutation in their OR6A2 gene, these people strongly dislike the smell of coriander leaves.  Other people do not have this mutation, these people tend to love coriander.  I am in the latter group.  I really love the smell of coriander.

Coriander is at its best when fresh, it doesn’t store or dry very well.  Small pots of hydroponically grown coriander are often found in supermarkets, they are better than nothing but usually the smell is weak and diluted.  For these reasons, to have decent coriander you must grow your own.

Coriander has a bad reputation for being finicky and difficult to grow.  It dislikes being transplanted and often bolts to flower if the roots are disturbed even if the plant is tiny.  Coriander is best used in summer meals, yet it dislikes heat and will flower within days if the temperature is too high or if the weather changes too fast.  To make matters worse, many places sell seed of ‘slow bolt’ coriander that is not slow to bolt.  To help overcome this you can plant coriander seed and only save seed from the slowest to bolt in your garden.

Most varieties of coriander are extremely inbred and display little to no genetic diversity, so improving coriander can be a long journey with frustratingly small gains.  To help overcome this I deliberately crossed about a dozen varieties from several different countries.  I had originally planned on selecting for slow bolting but am deliberately maintaining it as a genetically diverse grex so people can grow it and select for slower bolting themselves.  Grow them, eat them, enjoy them, and kill off every plant that flowers early.   With this amount of genetic diversity it won’t take long before you have a variety that you created yourself to be the most productive in your garden.

Unfortunately, there is only so much heat coriander will cope with.  When it gets hot and dry coriander bolts to flower and set seed.  Unfortunately it is when the weather is hot that I want coriander, so I am searching for coriander substitutes.  I searched the internet and was told things like parsley or thyme can be used as substitutes, which they can’t.  Parsley and thyme are not even remotely similar to coriander.

In the past I grew ‘perennial coriander’ (Eryngium foetidum) which tasted similar to real coriander but I lost it in a move and have not been able to get another.  The leaves were also a bit tough for my liking but that may have been due to the growing conditions.   I thought about getting another one, and I probably will one day, but for now I am trying something else.
Papalo underside of leaf

Papalo top of leaf
Recently I got seed for some herbs named papalo and quillquiña.  They have many common names including "Papaloquelite", "Butterfly leaf", “Bolivian coriander” and “Mexican coriander”.

Unlike true coriander, papalo and quillquiña are said to love the heat.  They never bolt to seed in hot weather.  I have seen them described as being like summer loving, strongly scented, heat resistant coriander.  That sounded like it was worth a try.

Other than overseas seed sellers and a few confused foodies on cooking/travel sites there is little information about papalo and quillquiña on the internet.

The place I bought them from lists papalo as Porophyllum coloratum and quilquiña as Porophyllum ruderale.  I am not certain that these are the correct species.
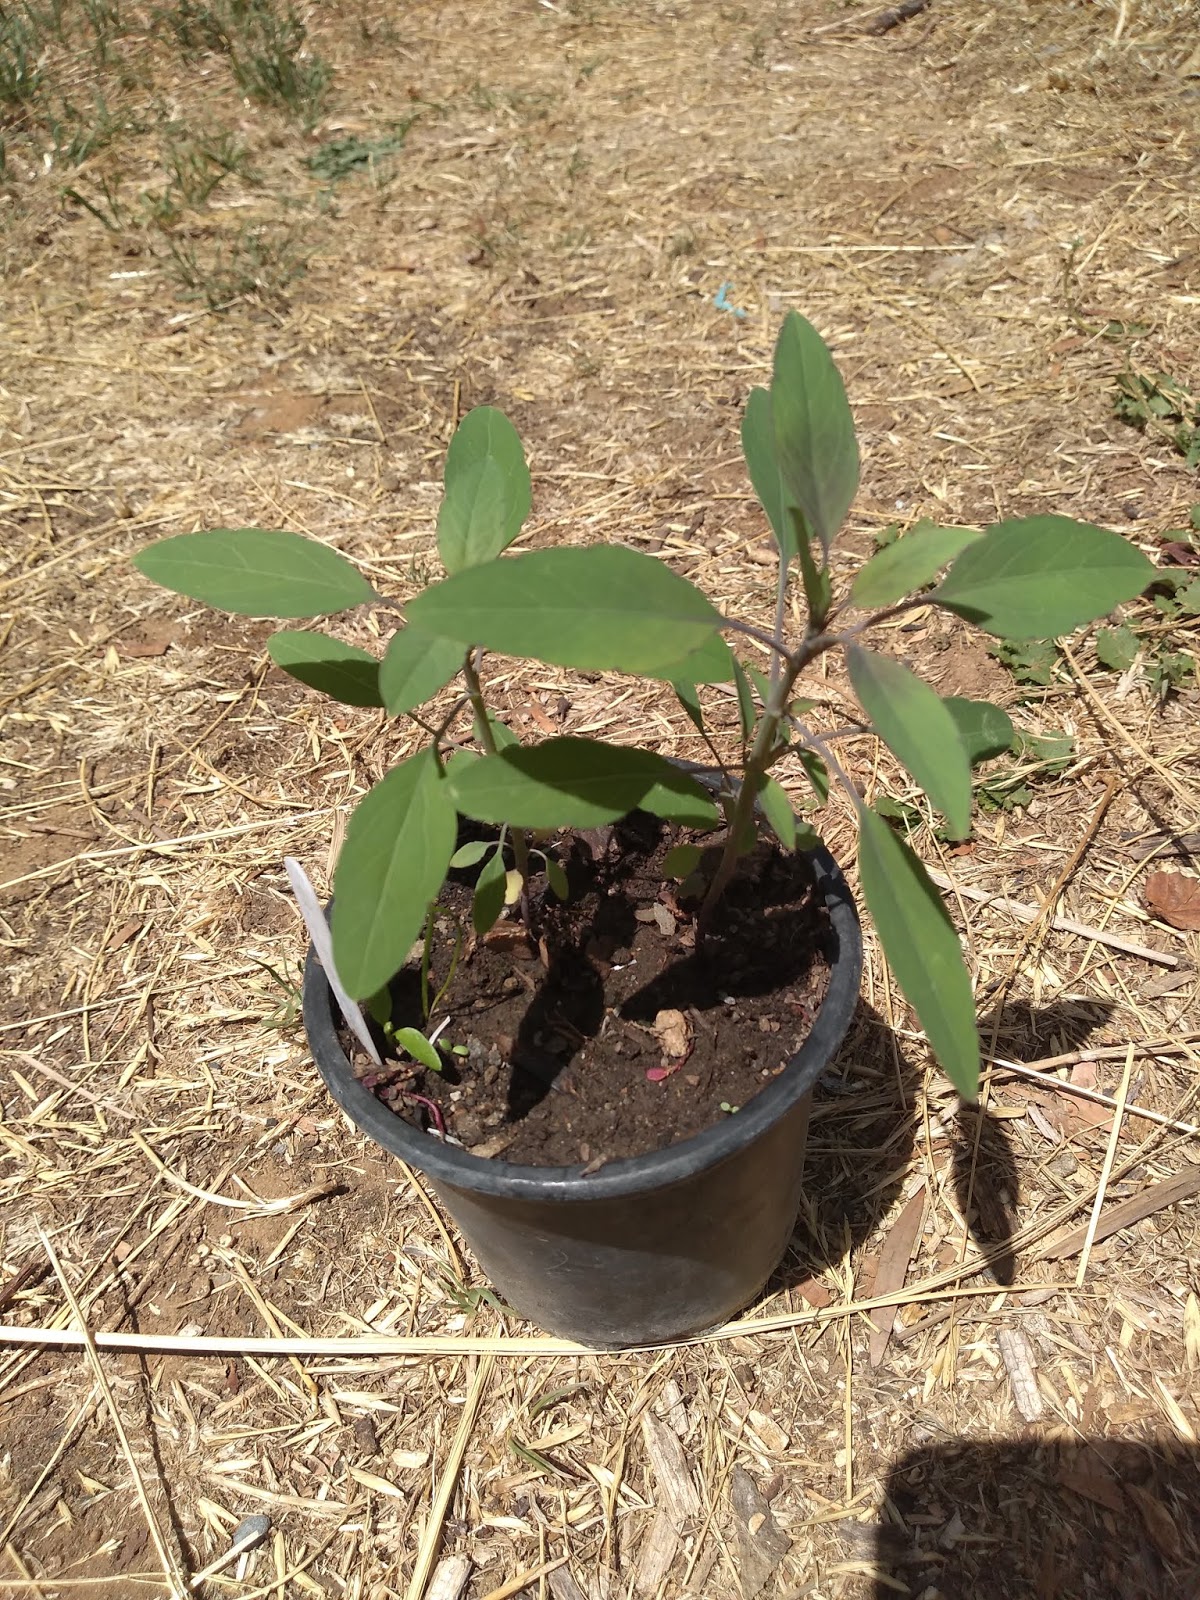
Papalo young plant

Most overseas sellers either list both as varieties of Porophyllum ruderale, or they use the term papalo and quillquiña interchangeably for the same plant.  Other people claim this is one species with a narrow leaf form (papalo) and a wide leaf form (quillquiña).

Unfortunately there is little information available, and most of it is contradictory, so I don't know.  I know they are both from the genus Porophyllum, but don’t know what species they are or if they are the same species or not.
Quillquiña seedlings - one is green the other has some purple
Quillquiña growing larger

I found one reference claiming papalo and quillquiña to be subspecies that cross pollinate easily.   This person who said this claimed one flowered early and the other late, and once the early one set seed he would remove any further flowers to prevent it crossing with the later flowering one.  I am not sure if any of this is true.

The person I got seeds from lists papalo and quillquiña as separate species.  I asked the seller if they will cross pollinate and he said he attempted to cross pollinate them by hand but has not been successful.  As far as he knows they cannot cross pollinate.

Again, I don't know if this is true or not.  All I know is that the person who sold me the seeds in as honest bloke and was answering my questions to the best of his knowledge
Papalo - also called 'butterfly leaf' because the leaves flutter in the wind
Papalo with blue green leaves
I don't know what to think and hope to learn more in the future.  This summer has been hot and dry and horrible, but my papalo has grown well.  If my plants flower this year I hope to save seed as this is not a plant I ever wish to be without.
Papalo leaves - note the oil glands

Papalo and quillquiña are often used as coriander substitute, but they taste different to coriander.  They have a strong undescribable smell and a unique taste that I love.

Papalo and quillquiña taste much like each other, but they have different shaped leaves.  They smell rather intense, and I really like them.  Now that I have tried them I almost crave them.

Many people rave about how great papalo is. Some chefs refuse to be without papalo.  I have been told that in parts of Mexico papalo is kept on restaurant tables in glass of water so people can use them to spice up their food similar to how salt and pepper are found on restaurant tables in Australia.  I can understand that, I would probably go to a restaurant if I knew they had papalo.

Some people, like me, love the intense flavour of papalo.  Other people hate these herbs with a vengeance and describe them as smelling similar to skunk urine.  I don’t know if people who have a mutation in their OR6A2 gene and hate coriander also hate papalo and quillquiña, judging from the strongly polarised reception these herbs get I am assuming so.  Then again, my son loves coriander and hates papalo so perhaps there is more to this?

I have a lot to learn about these herbs, I hope they grow well in my climate and that at least one of them is useful as a summer coriander substitute. I will always grow coriander as it is one of my favourite herbs and papalo is not an exact match, but it would be nice to have something else to grow for when the weather is too extreme for coriander to thrive.

If I am able to save enough seed in autumn I will try to offer it through my for sale page.   While I am told that they won't cross I am not certain.  They do both smell the same, so if they can cross the resultant seedlings should taste the same but have different shaped leaves.

Friday 17 January 2020

Savory herb (Satureja species)

Several years ago I was at a plant nursery looking over their various herbs. Among the usual collection of common herbs were ‘winter savory’ and ‘summer savory’. They both looked similar to one another, they smelled relatively similar. I tasted both (yeah, I am that guy) and I liked them. They were both relatively similar to thyme, I already had thyme and I had never eaten savory before so I didn’t get either of them.

Savory, both winter and summer, taste different enough from thyme that they are worth growing. Unlike thyme, savory plants are rarely offered for sale in Australia for some reason. It took me a few years to see either of them again and be able to grow them. I am glad that I did eventually find them again, they are great little herbs.

Overseas savory is often sold in bunches in supermarkets with other fresh herbs, and many people would not know how to cook without it. For some reason savory is relatively unknown in Australia and I have occasionally seen it for sale dried and never in fresh bunches.

Very few people in Australia have every tasted savory, and even fewer have been lucky enough to grow savory. Hopefully that will start to change and more people will be able to eat savory as it adds something special to a meal that thyme is missing.
Savory looks similar to thyme with slightly larger leaves

I find it interesting when I talk to anyone know knows what savory is, they all seem to love savory and most have strong opinions about which type is the best. Some prefer the bolder stronger flavour profile of winter savory, while others love the more subtle and sweeter summer savory. Savory isn’t like polarising herbs such as coriander leaf, it isn’t an acquired taste, and everyone who has eaten savory seems to like it.

Savory can be used fresh or dried in any meal where you would normally use any herbs. We tend to only use it fresh, but that is because I have it growing and it is easier to pick it and use it now rather than think ahead and dry some. I am a better gardener than I am a cook, so rather than try to tell you how to cook with savory I will tell you how I grow it.

Savory is a typical Mediterranean herb, by that I mean it likes full sun and doesn’t need much care. I don’t know if it suffers pests or diseases because mine never have. I grow everything organically, I don’t use the organic poisons, if something is hit by pests or something it may be for the best that I let it die off. Savory plants look and behave a lot like thyme plants. Mine never grows very tall, maybe a little over 20 cm, it slowly spreads but I can’t imagine it ever being invasive.

Like many herbs, regular harvesting seems to make these plants more productive by encouraging leaf growth and delaying flowering. I try not to harvest summer savory too late in the season as I want them to set seed for next year. Normally this isn’t an issue and there are a few plants I didn’t know I had that are flowering somewhere safe.

When harvesting savory you could somehow remove individual leaves, but that sounds like far too much effort. Just like thyme we just cut off sprigs and roughly strip the leaves from them. These sprigs usually have a few leaves still attached, the mostly leafless sprigs can then be planted in soil, or put in a cup of water, where they will act as cuttings and provide you with more plants. Both summer savory and winter savory can grow from cuttings in this way.
Savory flowers are similar to thyme flowers

The two most commonly found varieties are summer savory and winter savory, I grow them both as they are different enough from each other and both nice enough that they have earned a spot in my garden. I also grow the rarer and really delightful lemon savory.

Summer and winter savory are very similar species that to the best of my knowledge won’t hybridise. They both grow into small plants, they both have tiny fragrant edible leaves, and the little flowers are loved by bees and other insect pollinators.

Summer savory (Satureja hortensis) is an annual plant that will grow in spring, flower in summer and autumn, and die off completely before winter. While it is really simple to grow from seed, summer savory seeds are tiny and difficult to collect so I just leave it alone and it seems to self-sow happily. I love growing things that self-seed for me as it means I don’t have to think about them too much, it also means each year selective pressure is applied and they become better adapted to my garden. You can also grow summer savory by cuttings during the warmer months. Summer savory has a delicate and sweet aroma that some people simply adore.

Winter savory (Satureja montana) looks much the same as summer savory, but is a perennial. This grows all year, albeit slower in winter, and can grow from cuttings. They also produce tiny seeds that are difficult to collect, so I normally grow it from cuttings which is far easier. Winter savory has a stronger more peppery aroma that some people prefer. Even if you prefer summer savory it is worth growing this so you always have some form of fresh savory to use.
Lemon savory - my favourite savory

I also grow lemon savory. I am told that there are a few different types of lemon savory, the one I grow appears to be a lemon scented form of winter savory (Satureja montana citriodora). Lemon savory is by far my favourite type of savory! I told you everyone has strong preferences when it comes to savory. With its clear clean lemon taste I prefer this to lemon thyme. This herb looks like the other varieties of savory and is perennial. As they are the same species, lemon savory will cross with regular winter savory, so if saving seed you need to take care. If you propagate these from cuttings (as I recommend you do) then there is no need to worry about trying to keep these two varieties of winter savory apart.

Savory herb is very simple to grow and tastes great. At the moment savory plants are difficult to find in Australia. When I have extra plants I will probably sell a few different varieties of savory and list them on my for sale page.

Saturday 11 January 2020

Woolly leaf tomato in Australia

Years ago I used to grow a tomato with the angora leaf gene.  This gene causes extra/branched trichomes on leaves and stems giving them a fluffy feel and interesting appearance.

I grow a tomato called "Angora 82" which kind of shows this trait, but not like I remember it.  This variety was in with some very old seeds (at least 23 years old) that I grew and I don't know where I originally got it from or where it got its name.  Angora 82 is high yielding, very compact, tastes very sweet, so it is worth growing, but it is not as woolly as the plants I remember.  None of the other old seeds with the word 'angora' or 'woolly' in their title germinated at all.  Considering their age I was happy that any germinated at all.

It appears that the angora gene was gone from Australia.  Importing tomato seeds into Australia is far too difficult and expensive for home growers, so it looked unlikely to be able to grow fuzzy tomatoes like this ever again.

Then a seed company in Tasmania listed one of the newer bred tomato varieties which carries this gene.  I didn't ask how they got this variety, I was just happy that they were able to sell me some seeds.  The variety they listed is called 'Woolly Kate'.

Angora leaf tomato
Woolly leaf tomato - looks like it is covered in frost
Woolly Leaf tomato flowering - stunning white foliage
This year I am growing a few "Woolly Kate" tomatoes.  They are a high anthocyanin tomato (they produce blue or black fruit) and they carry the angora leaf gene.  There are very few blue fruited woolly leaf tomatoes so being able to grow this variety is a real treat.

The leaves are green and covered in hairs.  None of these photos do them justice, in the right light they shimmer white and look like they are covered in frost.  Sometimes in late afternoon they sparkle in ways that I can't explain in words.

There are a few different genes that can cause the woolly leaf trait in tomatoes.  One is dominant and is homozygous lethal, and one is recessive.  It is difficult to tell them apart without growing out a large number of seeds, and crossing them with a variety that does not carry this trait is very helpful in working out things.

I am happy to say that this is from the recessive gene.  This means it will be relatively easy to do some tomato breeding and insert this gene into other new varieties. 

Woolly tomato leaf shimmers in the right light
Many plants that are covered in hairs like this use it as a way to protect themselves from harsh sun or excessive heat.  Sounds useful in Australia.  In other plants the leaves help protect them from mild frosts, which would be useful in extending the growing season.

It is currently unknown if this woolly leaf trait helps tomatoes be more water efficient or grow better under hotter condition or protects from mild frosts.

I would also be interested to know if tomatoes with woolly leaves are more resistant to pests and diseases, or if they have more issues with pests and diseases.  At this stage I am not really sure.

This summer has been the hottest on record for this region, it is also driest on record for this region, and I have very little water, so it will be interesting to see how the yield of these tomatoes compares to other varieties.

Even if the woolly leaf trait does not help in any way the plants really look amazing so I will keep growing them.  The leaves also feel soft, kind of like a plant called lambs ears (Stachys byzantina).  My kids keep touching the leaves each time they walk past them, they are really fascinated with Woolly Kate tomatoes.

Woolly Kate in the foreground, various other tomato varieties in the background
This summer has been pretty dreadful in my garden (and pretty much everywhere else in Australia).  I planted late, then it has been very hot, very dry, I haven't had much water to spare, we have had several intense dust storms, and there have been many weeks of thick bush fire smoke.

At this stage I don't know if my plants will survive summer.  This summer already I have lost a lot of things that have always performed well for me.  My other surviving tomato plants are all flowering but the flowers are aborting, so far only Woolly Kate has a few unripe fruits that have not dropped off.  The tomatoes are fluffy and the plants seem to be handling the extreme conditions better than my other varieties so far.
Woolly Kate grafted to a regular leaf plant, the difference in foliage is amazing

If I get to save seed from Woolly Kate and if I have enough spare seed I will try to list them for sale through my for sale page.  If not I should have enough seed to sell in future years.  I also have plans for breeding with them to get a few other varieties with woolly foliage in Australia.


Woolly leaf tomato with unripe fruits
Blue fuzzy tomatoes still not ripe

Saturday 4 January 2020

Air Quality

The air quality over the last five or so weeks has been pretty bad due to all the bush fire smoke.  So far we have been lucky and there hasn't been any real danger to us, but there are still a few months of fire season to go.

Below is a graph of three air quality stations from Canberra over the first week and a bit of 2020.  The one day where air quality was ok on the graph we had a large dust storm.  I am not sure if the dust storm made it to Canberra or not.

The craziest part of this is that we have gotten off lightly so far.  There have been a lot of places far worse than it is here.

When smoke is combined with record breaking heat, record breaking dry, it makes this summer rather unpleasant.
The dotted purple line at 200 is considered a hazardous level, we are way above that!
Some days the smoke isn't too thick.  The hills in the distance haven't been seen in some time
Other days the houses are completely lost in the smoke
This is the day the smoke cleared, and the dust came.  The dust got thicker than this
Some days everything is bright yellow

Thursday 2 January 2020

Edible chrysanthemum days to harvest

Edible chrysanthemum is also known as garland chrysanthemum, chop suey greens, shungiku, crown daisy, Japanese greens, chrysanthemum greens, tong hao, tung ho, tang ho, chong ho, kor tongho, tong ho choy, tong hao cai, thung ho, kikuna, tan o, cai cui, ssukgat, cooking chrysanthemum, khee kwai, gul-chini, and it probably has a few other common names. 

This plant was once classified in the genus Chrysanthemum (hence the common name of 'edible chrysanthemum') but has since been reclassified as Glebionsis. 

Edible chrysanthemum is a nice looking plant with pretty flowers that are not only edible but seem to be popular with beneficial insects.  I grow them organically and have no issues with pests or diseases.

Seed was planted on a heat mat in late winter and germinated incredibly fast!  The leaves, stems, flowers are edible.  Unfortunately I forgot to record when the leaf harvest started, but it was pretty early

Days to maturity edible chrysanthemum (Glebionis coronaria) serrated leaf

Seeds planted       17/08/2019       Day 0
Germinated           20/08/2019      Day 3
Flowering             22/12/2019      Day 127
Edible chrysanthemum flower
Edible chrysanthemum leaves - serrated leaf form
Pollinators and other beneficial insects seem to like the flowers

Monday 30 December 2019

Guest Post: Carnivorous Plant Growing Guide

At some stage I will probably write some posts about how I grow carnivorous plants.

Unlike most of this blog, the following is not my work.  The following is a guest post written by Beauze Menzies.
_____________________________________________________________________________


Media & Materials:
 
Carnivorous plants as a general rule need low nutrient soils based on sphagnum moss products such as peat or long fibered sphagnum which is often used for orchids. Using distilled or RO water is important unless your tap water is under 100 ppm (this number varies by species i.e. nepenthes can tolerate higher ppm).
 
For plants like pinguicula (pings or butterworts) using a soil mix low in peat that is well draining is important and mixes containing no peat have been used successfully. For pings, it might be of interest to try mixing your own soils based on cactus soil recipes that don’t require any real soil (so a rock based soil).
 
Bog CPs like Sarracenia can grow in a wide variety of soil mixes from pure silica sand to pure peat. However, a combination between the two ingredients is often used and is a safer bet than using peat or sand straight. This is also true of flytraps, but currently using long fiber sphagnum is a popular choice for growing them well. However, long fiber sphagnum is very light and dries out quickly, and when wet again, it can become a soggy mess.
 
Proper aeration seems to be key for all CPs.  To maintain aeration, peat is often mixed with course silica sand (free of contaminates) and/or perlite. Perlite has an annoying tendency to float to the top when watered and doesn’t look good. Another way to make sure nothing literally gets “bogged” down is to let the water tray dry out for a day or two between watering. This will allow air to get back on the soil and keep the bacteria down and can be beneficial for some CPs.
 
I use standard black plastic nursey pots placed in 1020 heavy duty nursery trays for most CPs. Flytraps have long roots so they benefit from taller pots. Many people use Styrofoam cups for this reason for their flytraps but it doesn’t look good obviously. For Drosera capensis I plant them directly in a 1020 nursery tray or similar tray and water them directly or place them in an even larger tray for watering. Getting white pots or somehow painting the pots white would be highly recommended if the plants will be outdoors.
 
Flytraps:
 
Venus Flytraps need full sun outside, tall pots, and whatever humidity you got naturally. Don’t stick them in a humidity dome! In hot areas they can be kept full time in a tray of water but a taller pot should be used so the soil at the top doesn’t become waterlogged.
 
Flytraps can be propagated clonally by divisions, leaf pullings, and nonclonally by seeds (Seeds do not need stratification but must be surface sown so not buried). 

A leaf is simply pulled off and floated in water under a light for a few weeks until a bud forms at the base. However, if the leaf does not contain a small section of the crown it will not take so you cannot just cut a leaf off. You can cut a young flower stalk off though and treat it like a leaf pulling and it will also form plantlets.
 
Sarracenia:
 
Adult Sarracenia should be grown full time outside. During the growing season they are kept in a tray of water, but some sarracenia such as leucophylla do not like having constantly wet feet so it is important to let the soil dry slightly between waterings which will help prevent rot too. During dormancy they are often brought into a protected area like a basement to protect them from sudden freezes. It is important to watch for rot in the crown and for mealybugs that live in the roots.
 
For large Sarracenia displays, many people build water tables which allow viewing from eye level and hold water. However, since the water can get stagnant this can also promote rot since it’s essentially a giant tray… and the rot can spread very fast with so many plants sharing the same water. Having the water table slope slightly and having the water constantly being pumped up and filtered will prevent this stagnation. This constantly flowing water could possibly also reduce the need for drying out times between waterings but this needs experimenting.
 
Sarracenia seeds need four weeks of moist stratification before surface sowing. Young Sarracenia grown from seed can be grown indoors and can skip their first year of dormancy. These young plants will need a grow light such as a T5 fluorescent or Marshydro 300 LED (see Darlingtonia). While these lights can be costly but using them correctly (16 hour days) can drastically improve juvenile Sarracenia growth rates. Another way to improve their growth rate is by using Osmocote pellets about an inch under the peat mix (https://www.carnivorousplants.org/grow/feed/sarraceniasoil) . In addition, many people foliar spray or fill the pitchers with ¼ strength Maxsea. One thing to remember with Sarracenia seedlings is that they will need repotting and more space as they get bigger. So, if you are not planning on culling heavily, be prepared for sarracenia overload.
 
Drosera:
 
Drosera can be grown outdoors or indoors depending on the species. If indoors they will need a grow light such as the ones recommended for Sarracenia seedlings but keep in mind that a purple LED will make viewing your Drosera difficult. South American Drosera are often picky about growing conditions and need high humidity. African species vary from capensis, which is considered the easiest CP to grow, to D. regia which needs porous soil and literally needs fertilizing. North American and European species tend to need long dormancies since they’re from cold climates (filformis and tracyi not so much?) but there is easier to grow forms such as the Hawaii form of D. anglica and the rotundifolia cultivar: “Charles Darwin” (If you can find this cultivar!).  Australian species…. No idea really except for binata which is easy to grow – the other Australian species look awesome though.
 
The larger forms of Drosera binate (marston dragon, multifida, etc.) do not flower often. To force flower them you can take them out of their water tray and only top water them occasionally. This will make them dry out a lot and they won’t be too happy. Just give them enough water so they don’t die. This took about a month for me. They should produce flower stalks at which point you can water normally again. If you want seeds, you’ll need to lightly rub flowers from different clones together to cross pollinate them. Interestingly, doing this did not get my smaller T-forms to flower so I am uncertain whether they are unaffected by this procedure or if they are were too small. If it matters, which I don’t think it does since I rarely chance the light’s timer settings, the binata started flowering in Autu
 
Drosera can be propagated easily by leaf cuttings which, unlike the flytraps, can be simply cut at the base and thrown in some water (https://www.carnivorousplants.org/grow/propagation/DroseraLeafCuttings).
 
Most Drosera species do not need special care if being grown from seed unless it’s a North American Species which will need stratification. Tuberous sundews need to be set outside to germinate since they will only sprout if the day length is right so it can take some time. Germination for common species like capensis will take two weeks normally but can take longer. Drosera also need to be surface sown like most other CPs since the seeds are so small. This also makes it important to make sure the seeds won’t dry out so covering the pot with a plastic bag is common practice until the seedlings have a few leaves (on all CPs actually). To make sure you have good soil to seed contact you could use a thin layer of pure peat on top of whatever peat mix your using and then put the seeds on top of that. This is a good idea if your normal peat mix contains lumpy bits of perlite.
 
Baby Drosera will need feeding. The best way is to rehydrate bloodworms by dipping them in water (the dew will not rehydrate them) and placing a tiny piece on one leaf of each baby drosera. This will take forever, and you’ll need tweezers and possibly a magnifying glass. I was able to get very fast growth rates on baby capensis that were planted in long fibered sphagnum by top watering them often with Drosera pretransplant tissue culture media (from phytotech) without sugar or agar. The seedlings did not suffer negatively from the fertilizing at all which makes sense because drosera in sterile tissue culture grow just fine on that media.
 
The Darlingtonia in both pots are the same age and from the same seeds. The only difference is the larger one is potted with S. leucophylla and has osmocote. Photo taken December 19th – smaller Darlingtonia went dormant Oct 17th.
Darlingtonia:
 
Darlingtonia need good light, a light soil such as live sphagnum, and a steady supply of water in their tray. Having the water be recirculated by a pump probably wouldn’t be a bad idea. However, the biggest problem with Darlingtonia is the fact they die in any sort of heat especially if the roots of an adult plant get hot (young plants are slightly more tolerant of heat). There is an easy solution to this though and that is growing them indoors with AC under a good grow light such as those recommended for Sarracenia seedlings. The annoying purple color of the Marshydro LED is something to consider when deciding which light to buy. The T5 is widely used, produces some heat, but I have no personal experience with it. COB LEDS come in daylight colors and could be an excellent compromise.
 
The darlingtonia will need a winter dormancy so make sure to decrease the light’s daylength at the same rate as the daylength outside as winter approaches so the plant can prepare for dormancy.
 
Propagating darlingtonia can be easy since they produce rhizomes which can be cut and used to grow new plants. More difficult if by using leaf pullings. Germinating seed is easy and while I used a six week stratification, it may not be required for fresh seed. Darlingtonia naturally produce seeds earlier in the year like flytraps which would suggest they too don’t need stratification and can sprout right away. http://sarracenia.proboards.com/thread/2382/darlingtonia-house-2015
 
Shortly after the darlingtonia seeds sprouted I had transplanted one of the darlingtonia seedlings to a pot that contained S. leucophylla seedlings and possibly some Osmocote. I have not given this individual dormancy yet unlike the other darlingtonia seedlings which are now in the fridge (not cold enough outside where I live). Before I put the other seedlings away though I decided to check if they were the same size as the seedling with the leucophylla. Surprisingly, the one darlingtonia with the leucophylla was double the size. I am not sure if this was because of the Osmocote or if the Sarracenia seedlings were beneficial in some way. If I had realized that transplanting the one to the leucophylla pot would speed up the growth rate so much I would have paid much closer attention to the details, but I had thought nothing would come of it.
 

Thursday 12 December 2019

Pumpkin growing roots in weird places

For a few years I have been growing a pumpkin called "kaempw melon rilon".  I quite like it.  It is productive, tastes good, and is usually very vigorous.

It has two down sides, firstly the pumpkins are a little big for my liking.  Secondly it has a thin skin.  Thin skin means it is easy to cut and the skin is soft enough to eat, but it doesn't store as long as thicker skin varieties of pumpkin.

Unfortunately the last few years have been very dry.  This means my plants don't get much water.  When not watered well the flesh tends to be thinner than it otherwise would.

After being dry for too long, when we do have any rain the skin tends to crack and the cracks fill with cork.  When the skin has cork like this is makes it more difficult to cut and while the flesh is still nice it renders the skin inedible.  The easiest way to remedy this is give the plant regular water.

Kaempw melon rilon has a lovely habit of setting down roots along its stem where a node touches the soil.  This means the plant gets more water and nutrients than it otherwise would.  I wish all my vegetables would do this.

Sometimes a pumpkin vine sprawls over onto the lawn, it throws down some roots and collects nutrients and water that otherwise were unobtainable.  What a great trait for a pumpkin to have.

Last time my pumpkins fruited something strange happened.  Can you see it in the photo below?

Have a closer look at this pumpkin.  At first I wondered why this pumpkin was so heavy, then I realised what was really happening.  It grew roots on the pumpkin stem! 


While this may never win a beauty contest I don't care.  I want productive plants that are simple to grow.  Having roots like this right next to the pumpkin meant that the pumpkin grew faster and had more flesh than other pumpkins produced that year.


If you are a seed saver you should grow this pumpkin.  I sell seed through my for sale page, but if anything happens to my stock then I worry that I can never get this variety back again.  I am running low on seed and this year my plants are not performing very well as I don't have enough water for them, this variety needs more seed savers taking care of it.

Thursday 5 December 2019

Growing string of pearls succulent in water UPDATE


Back around August 2018 I started some string of pearls (Senecio rowleyanus) cuttings in water.  I removed the lower few leaves (pearls) and put the stem in water.  I normally grow cuttings in soil, but thought I would give water propagation a try to see what happens.  You can read about it in my previous blog post

Being a succulent I wasn't sure that growing them in water was a great idea.  As it turns out my sting of pearls cutting grew roots pretty fast.  That made me wonder how long it would survive like that.

I then left it in the water, it was just water, nothing else. I top up the water when it is low, and keep the cutting by the window, that is all.  I thought it is time for an update as it is December 2019 and the cutting has been growing for about 16 months.

As you can see below, it is still alive - who would have guessed?  It is growing far slower than the cuttings I grew in soil, but is is growing.  I assume the low growth rate is due to the lack of nutrients in water.  It has not rotted like I thought it would.  I am really surprised that it has survived this long in nothing but water.

The only thing that it seems to be struggling with is the lack of sunlight.  You will notice that the newer parts are decidedly less green than the older parts.  I also bruised the stem when I got it out of the water once to inspect the roots, but it seems to have survived that pretty well.

I am expecting this cutting to die at some point if it is constantly kept in water like this.  I think I will leave it in water at least a bit longer, once it starts to decline I will probably try to pot it up into soil and see if I can revive it.

I do sell string of pearls plants and cuttings through my for sale page.  Rest assured, none of them have been kept in water.  They have all been grown in pots of soil.
String of pearls cutting after 16 months of growing in just water

You can see where it started to grow roots on the left, everything to the right is new growth


Tuesday 3 December 2019

Venus Flytrap from seed

I haven't grown venus flytraps from seed in years.  I used to enjoy it, so I gave it another go recently.  Growing Venus flytraps from seed takes more patience and time than just getting a mature plant, but the seedlings are so cute.  Each seedling is genetically unique so you can end up with some interesting looking plants.

Venus Flytrap not too long after germinating

Days to germinate Venus Flytrap (Dionaea muscipula)
Seed planted             13/03/2019      Day 0
Germinated              08/05/2019       Day 56

I had one seed that was even slower!
Seed planted             13/03/2019      Day 0
Germinated              21/09/2019       Day 162 - over six months
At this size they catch fungus gnats

From memory, it usually doesn't take this long for Venus flytrap seedlings to germinate, and it certainly doesn't usually take this long for it to produce carnivorous leaves.  Slow germination can be caused by a few things.  Older seeds take longer to germinate (or don't germinate at all), but I don't think that was the issues this time.

Colder weather slows the germination process considerably, I think it was just too cold for fast results.  I suspected it was too cold before I planted the seed, but I was too impatient.  I got some seeds and just couldn't wait to plant them.


Edit to add: I planted some more seeds in warmer weather.  They germinated a bit faster but still took six weeks:
Seed planted             30/11/2019      Day 0
Germinated              11/01/2020       Day 42


WARNING: do NOT buy venus flytrap seeds from ebay.

Many ebay seed sellers are thieves.  They may be local, have 100% positive ratings, super low prices, large numbers of seed per packet, and incredibly fast postage, but it means nothing.  Almost all seeds for venus flytraps on ebay are not real, they will send you seeds from some packet of cheap flower seeds.

Never buy seeds for blue venus flytraps because they don't exist.  They will not even send you venus flytrap seed, they will send cheap seeds for some type of garden flowers, by the time they have grown and you realise something is amiss it will be too late to leave negative feedback or get your money back.  You will have lost your money and supported thieves.  Blue venus fly traps don't exist, the people selling seeds of them are thieves and liars. 

If you think blue venus flytraps are real (there is at least one very aggressive ebay thief who claims they do exist and says horrible things about buyers who claim they don't) then send me one, or send me seeds, or even send me a leaf pulling or a cutting from a flower stalk.  I will grow them, and photograph them, and link back to you, so thousands of people will see them and many will buy from you.  Seriously, thousands of people will see your amazing plants and I will link to you so you can make a fortune selling them.  None of these thieves will ever take me up on this offer because blue venus flytraps don't exist and they never will exist.

For a full list of vegetable days to maturity (I know that flytraps are not really vegetables) please click here.