Saturday, 21 March 2020

Growing asparagus from seed - days to maturity

I planted asparagus seeds on a heat pad under lights, I did not soak the seed prior to planting.  I planted three varieties, Precoce d'Argenteuil, Connovers Colossal, and Mary Washington.  Oddly enough they all germinated on the same day.  I also planted a Purple Passion asparagus on a different day.

Days to maturity asparagus (Asparagus officinalis)
Seeds planted       10/08/2019       Day 0
Germinated           29/08/2019      Day 19
Flowered               22/02/2020      Just over six months
Harvest start          xx/xx/20xx      Day- I plan to update this later

Edit to add: There is a bit of genetic diversity among seed grown plants.  I probably could have harvested the larger ones in their first year of growth but decided it better to wait.  A small harvest was possible after 12 months for the largest Precoce d'Argenteuil plants, the smaller plants were ready a year later.  The other varieties were ready for harvest in their second or third years.  

Asparagus seedling germinating

Many people say it is difficult to grow asparagus from seed.  I have grown asparagus from seed several times and while asparagus isn't the easiest vegetable to grow from seed, it is far from the hardest.  Seedlings are easily lost to slugs or snails, and it does take a considerable amount of time from planting the seed until harvesting asparagus.  Buying year old crowns gets you past the danger of losing them to snails, plus it gets you 12 months closer to harvest.  

Two things seem to make growing asparagus from seed difficult, firstly getting seed from a decent variety.  Don't waste your time on F2 UC157 as it is poor quality and produces 1/3 the crop of the commercially grown F1 UC157.  Many sellers on ebay have fake seeds, they will send you seeds that are not the variety you paid for, or sometimes seeds that are not even asparagus and by the time you realise something is wrong it is too late to do anything about it.  Please don't buy asparagus seeds from ebay.

Secondly the large amount of time involved when growing asparagus from seed means there is a lot of opportunity for things to go wrong.  Most people buy asparagus crowns to dramatically increase their chance of getting a healthy asparagus plant.

It is said that it takes three years until you get a harvest, this is sometimes true and sometimes not.  It depends on the variety, the gender of the plant (they come in male or female), and how well you look after them.
Six month old asparagus seedlings, some are about one meter tall

Seed grown asparagus should not be harvested in its first year unless it is a particularly large and impressive plant.  Some plants can be lightly harvested in their second year if they are large enough.  The third year they produce a crop which seems to increase each year for quite a few years.  Some plants may not be large enough for a small harvest until their fourth year.  Some varieties, such as Precoce d'Argenteuil, are larger and move vigorous than many other varieties.  It is usually possible to harvest this one year before other varieties.

If you buy asparagus crowns in Australia they are often one year old, this will bring you a year closer to harvest than seed grown.  Asparagus seedlings are often decimated by snails and slugs, year old crowns still need to be protected but will often survive a snail attack.  For these reasons, it is best for most home gardeners to buy crowns rather than start seeds.  Notice that I said 'most' and not 'all', if you want to grow asparagus from seed go ahead.

Unfortunately it is very difficult to find asparagus crowns of many varieties in Australia.  A few places sell Mary Washington, one sells the dreadful F2 UC157 (which they have renamed to make them sound nicer), and occasionally some sell crowns of unnamed purple varieties.

I am currently growing a few named asparagus varieties.  In winter if I have any extra crowns I will hopefully be able to list several named varieties of asparagus through my for sale page.

Saturday, 14 March 2020

Wally Venus flytrap growth rate over a year

Venus flytrap 'Wally' is meant to be low growing, with very large traps, vigorous growth, good colouration, and is meant to produce ample natural divisions over the growing period.

To me Wally sounds like the perfect Venus flytrap!

A very generous friend sent me two bare rooted divisions of Wally Venus flytraps.  I planted both in the same pot.  In hind sight I should have planted them in two different pots instead of the same one. 

These plants spent a bit of time in the post, then sat in my letter box all afternoon on one of the hottest days ever recorded in this region before I got home, and they still looked ok. 

Venus flytraps tend to handle postage surprisingly well.  Notice how good they looked when I planted them!

I figured I should photograph them every now and again to document their growth. 

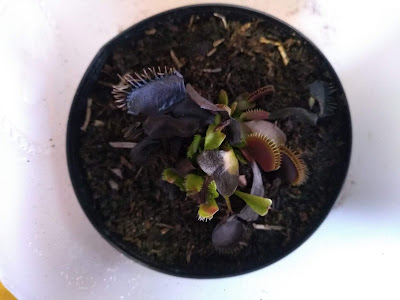
01/02/2020 Minutes after being planted, I should have zoomed in more as the picture probably makes them look smaller than they really were.

Wally Venus Flytrap - the day I planted them

11/02/2020 ten days after being planted


14/02/2020 two weeks after planting, they grow fast

Wally Venus Flytraps - two weeks of growth

22/02/2020 three weeks
Wally Venus Flytraps - three weeks after planting

29/02/2020 four weeks

Wally Venus Flytraps - four weeks after planting

I am transitioning my Wally Venus flytraps outside where they get more sun and will be able to go dormant when winter arrives.  The traps have coloured up remarkably fast from a little more sunlight.

While they haven't grown massively since the last picture they have gained a lot of colour.  I should take another photo soon to show their colour and how much larger they have grown.

28/03/2020 two months

Wally venus flytrap - more colourful and slightly larger

The pictures don't do it justice - the colours are more vibrant in real life

Wally sure is a lovely Venus flytrap.  It hasn't produced any divisions for me yet, but it is strong and healthy so I am very happy with it!

One morning we went out and when we returned home all of the traps were mysteriously closed.  I am not sure if kids came and played with it, but it seems to have recovered well.

04/04/2020  just over 2 months.  Today I divided them.  One stayed in the original pot, the other is now in a different pot the same size.  Wally venus flytraps are just lovely.


Winter isn't too far away and these will go dormant for a while.  I can hardly wait to see how large these plants grow next summer.  If all goes well I should be able to divide them into more plants in spring.

11/04/2020 - not much growth in a week but look at the colours!!!

02/05/2020 - getting ready for dormancy


01/06/2020 - Wally venus flytrap going dormant

 
Wally venus flytrap going dormant

01/07/2020 - I wish I took photos in July while they were dormant but I didn't.  They look dreadful while dormant, which is normal and actually very healthy for venus flytraps.

01/08/2020 - the same plants starting to come out of dormancy. They are small but look strong.  As soon as the weather is right I think they will explode with new growth.


29/08/2020 - late winter after surviving frosts, hail, snow, ice, and odd heat
Breaking dormancy

Wally vft clumping

30/09/2020 - after growing them for 8 months they are breaking dormancy, clumping, sending up flower stalks, and ready to divide

Sending up a flower stalk.  I removed a small division and should divide again

The small plant removed from the pot above

Wally Venus Flytrap Clumping - I may divide them soon

01/11/2020 - it is easy to tell which one has been growing inside the house, and which ones have been outside. 

Wally out of dormancy and growing strong

Wally vft growing well and colouring up nicely

Wally VFT divided and clumping

01/12/2020 - seems as though I didn't take pictures in December.


02/01/2021 - they are all outside full time in full sun

Large colourful traps, vigorous growth, Wally vft looking good

Wally VFT grow pretty fast

One of the divisions seems to have died off, others are looking good

31/01/2021 one year of growth!
Venus Flytrap Wally
 

All divisions are growing, none had died

Sunday, 8 March 2020

Tomato leaf comparisons

I wrote an earlier post comparing regular leaf tomatoes with potato leaf tomatoes.  This summer I also grew some woolly leaf tomatoes, so thought I would show some comparisons of these three tomato leaf types.

Regular leaf tomatoes are good, and there are heaps of types.  I like the look of potato leaf tomatoes.  The one below has relatively small leaves, I grow a few types with leaves that are far larger.  I imagine they would have issues growing in wet climates as they would have less air flow, but I live in dry climates so this is just an educated guess.

I love woolly leaf tomatoes, they look and feel amazing.  My kids can hardly keep their hands off the leaves.  Woolly leaf tomatoes would be well suited to a sensory garden!  They seem to cope better with heat, and they seem to do ok with less water than other varieties, but to be honest I don't know if they actually cope better or if I am just imagining it. 
Regular tomato leaf and woolly tomato leaf
Regular Leaf (often abbreviated RL)
This is the typical leaf type that most people are familiar with, most varieties of tomato have regular leaf.  The leaf edges are serrated quite a bit.  There are a lot of variations on this basic theme in terms of the width/length of leaf depending on the specific variety, climate and growing methods.  Some leaves are very narrow and are sometimes called 'dissected', others are wispy or droopy or look like the foliage of a carrot.  These are easily recognised as regular leaf tomatoes.  They carry at lest one dominant allele C.
Left to right: Regular leaf, woolly leaf, potato leaf
Potato Leaf (often abbreviated PL)
These leaves usually have very few interruptions of the leaf edge.  They are fat and large leaves, some varieties have huge leaves while others are far smaller.  Newly germinated seedlings sometimes don't show their PL nature until they are a few inches tall, others show it as soon as they grow their true leaves.  PL leaves often have a thicker cuticle than RL leaves or a higher density of trichomes (which are tiny little hairs on the leaf).  Leaf shape can be different on a single plant with some showing more or less smooth edges, all of this is normal for PL. Potato leaf is recessive, so any potato leaf tomatoes must carry two copes of the c allele.
Underside of leaves: Regular leaf, woolly leaf, potato leaf
Woolly Leaf tomato, sometimes called Angora Leaf
These are pretty easy to recognise as the leaves, stems, and fruits are fuzzy.  There are several different alleles that can cause the woolly trait, most of which are dominant and most are homozygous lethal.  This meant they would only carry one copy of the dominant allele (if they carry two they do not survive).  Another rarer form of this allele is dominant but it is homozygous viable and heterozygous intermediate, meaning they can carry one copy and be a little fluffy or two copies and be extra fluffy.

I really love woolly leaf tomatoes.  The variety I grow appears to carry the dominant yet homozygous viable allele for woolly foliage/stems/fruit.  A cross between regular leaf and woolly leaf produces a leaf that is only a little more woolly than normal.  It is difficult to tell that the cross carries the woolly allele at all.

Regular leaf top left, woolly leaf top right, cross of the two under/between them
Woolly leaf tomatoes tend to have fuzzy fruit

Woolly leaf allele is on a different locus to potato leaf, so it is possible to have regular leaf woolly plants, and potato leaf woolly plants.  It is also possible to have any of these all in green or any of them can be variegated.

I think I am going to have to do some breeding with micro dwarfs with the aim of a woolly micro dwarf tomato.  Time will tell what the future brings, but at this stage it looks promising.

Wednesday, 19 February 2020

Venus Flytrap seedlings

I thought I would show some pictures of a few of my little Venus flytrap seedlings.  They don't grow as fast as I would like, but every seedling is genetically unique and I really enjoy growing Venus flytraps from seed.

Probably the most difficult part of growing venus flytraps from seed is getting the seed in the first place.  Most people online selling venus flytrap seeds don't have the seeds and will send you some other seed.  Ebay is notorious for fake seeds, never buy flytrap seeds from Ebay.  By the time you work out that you have been taken advantage of it is far too late to do anything about it.

Most of my seedlings look like a typical venus flytraps, the only real difference between them and store bought plants is seedlings are tiny and cute.  Some are far more vigorous than others.  I am told it takes 3 or 4 years for a Venus flytrap to grow from seed to a mature plant, from memory that sounds about right.

I think they are all pretty great.  Most of them look like the one below.
Tiny seedling already catching insects
The same plant but lager.  Look closely: it is already dividing
The one below has a bit of red on the leaves but you can't really see it in the photo.  Time will tell if it turns out to be more red or if it will only have a little red.  It was planted later so doesn't have as many leaves as large as most of the other venus flytrap seedlings.  It has grown a bit and has a few more leaves than in this picture, but you get the idea.
This seedling has a little red on its leaves

Below is another seedling, but this one is different to the rest.  This one has yellowish leaves and the traps are red.  The traps are all a bit of a weird shape and so far none of the traps have opened.

I am not sure if this will sort itself out as it grows and it will look more typical, or if it is going to grow into an interesting mutant.  I can hardly wait until it is older so I can see what it will become. 

 
This Venus flytrap seedling is interesting

Same plant but older.  Most traps are now red and oddly shaped, the leaf blades are yellow
None of the traps have opened yet, I am not sure if it is just slow or a crazy mutant

This seedling is very slow growing, but I really like it
All of these seedlings have grown since I took these photos, I just haven't gotten around to taken any more recent pictures. 

At some stage I will try to sell some of my Venus flytraps.  When I do I will make it clear if they were seed grown, or if they are named cultivars that were grown from divisions or leaf pullings.  When I so sell Venus flytraps I will list them on my for sale page.

Saturday, 15 February 2020

Drosera capensis (cape sundew) seedings

About nine or ten months ago I planted some sundew seeds.  They were seeds from a relatively common and simple to grow sundew called Drosera capensis or 'cape sundew'.  They are native to the Cap of South Africa and often feature in people's carnivorous plant collections.  I quite like them.

The seeds I got were mixed 'typical' and 'alba', as a result I now have both typical and alba plants growing.  I prefer the look of typical capensis, but they are all nice in their own way.  I think growing both is nice.
One pot of my sundews

Sundew seeds are tiny, at first many grew but then winter came and a lot of them died.  Then we skipped spring and went straight into a really hot summer, and a lot more died.  Only the strong have survived, and these survivors have grown very well.

I have a few pots of these sundews, some inside and some outside.  I really need to repot them and separate them, but I enjoy having several plants in each pot so I will leave them for now.
Drosera capensis young seedlings
Some were too wet, they grew slowly
They grew larger and started to catch fungus gnats and other tiny insects

The more they caught the faster they grew, the larger they grew the more they could catch
Now they are large enough to catch house flies, moths, and other larger insects

Notice how the leaves curl around their insect prey

My little plants have grown even larger since the last pictures, they are really starting to look impressive and really need to be repotted into larger pots.

The ones I have growing outside are smaller than the ones I have inside.  I thought being outside would give them access to more insects, which it did, but they were also blasted by the heat of summer and covered in thick smoke for week after week.  Now that the weather is more mild the ones outside are starting to catch up in size and I expect them to surpass the inside plants.

Drosera capensis really is an easy to grow carnivorous plant.  I grew them when I was a child and loved them, I have enjoyed being able to grow them again.  They are hardy and forgiving and able to thrive in less than ideal conditions.  It won't be long before they are large enough to flower and set seed.

At some stage I will likely sell some of my sundews, and maybe some fresh seed.  When this happens I will list them on my for sale page.